How to Use Facebook Business Manager
Managing Facebook Pages, ad accounts, and team members from your personal profile creates chaos. Posts get lost, permissions become messy, and one mistake can compromise your entire advertising operation.
Facebook Business Manager (now called Meta Business Manager) solves this problem by centralizing everything in one secure dashboard. You’ll separate personal and business activities, control who accesses what, and scale your advertising without the headaches.
This guide walks you through every essential feature from initial setup to advanced campaign optimization. You’ll learn proper account configuration, asset management, team permissions, and security practices that prevent the costly mistakes leading to ad account restrictions.
By the end, you’ll have a fully functional Business Manager ready to support your advertising goals.
What is Facebook Business Manager & Why You Need It
Meta Business Manager is a centralized platform for managing your Facebook and Instagram business assets. Think of it as mission control for your entire social media advertising operation.
The platform gives you one place to control multiple Facebook Pages, ad accounts, Instagram profiles, pixels, and catalogs. Instead of switching between personal profiles and business assets, everything lives under one roof with proper permission structures.
Key Benefits of Using Business Manager
Business Manager delivers several advantages over managing assets through personal profiles:
Security and separation: Your personal Facebook profile stays completely separate from business activities, protecting both if issues arise
Team collaboration: Add employees, contractors, and partners with specific permission levels instead of sharing passwords
Multiple asset management: Handle numerous Pages, ad accounts, and Instagram profiles from one dashboard
Partner access: Grant agencies and vendors have temporary access without giving up ownership
Centralized billing: Manage payment methods and spending across all ad accounts in one location
Who Should Use Business Manager
You need a Business Manager if you:
- Run ads for multiple clients or businesses
- Manage a team working on Facebook advertising
- Own more than one Facebook Page or ad account
- Work with agencies or freelancers who need asset access
- Want professional security for business operations
Agencies managing multiple client accounts benefit from organized structures that prevent asset confusion. For those needing pre-configured, verified accounts, Uproas.io’s Facebook Business Manager services provide ready-to-use setups with proper verification already completed.
Business Manager vs. Meta Business Suite
Meta Business Suite is designed for single small businesses managing one Page and basic posting schedules. Business Manager is built for advertising operations, multiple assets, and team collaboration.
Use Business Suite for simple content scheduling. Use Business Manager for advertising, pixel management, and multi-account operations.
Prerequisites & Account Requirements
Before creating your Business Manager, gather these items:
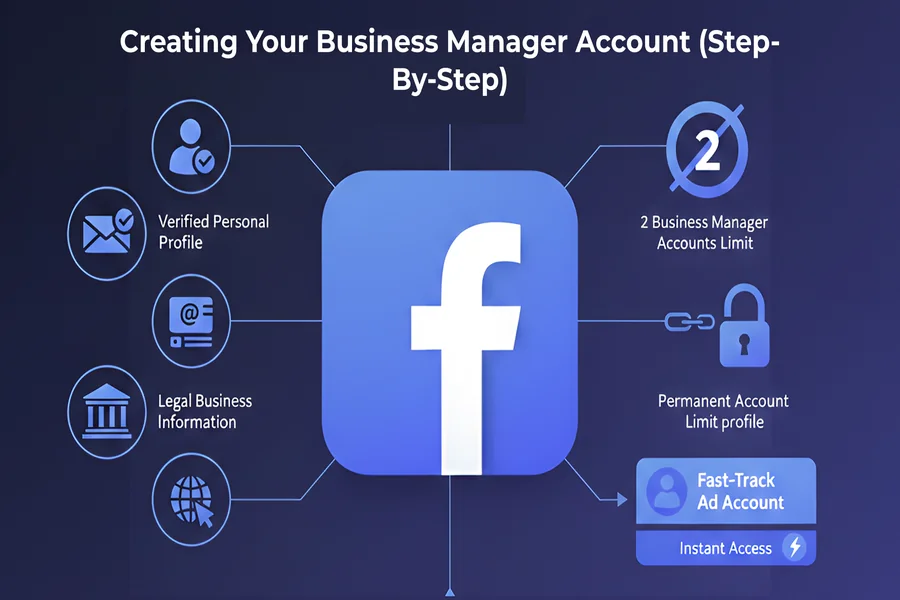
- Personal Facebook account: You must have an active profile with your real name
- Business email address: Use a company domain, not a personal Gmail or Yahoo address
- Business information: Legal business name, address, phone number, and website
- Account availability: You can create a maximum of two Business Manager accounts per person
The two-account limit is permanent and tied to your personal Facebook profile. Choose carefully which businesses get dedicated Business Managers.
For beginners who want to start running ads immediately without the setup complexity, using a Facebook Ads account for rent provides instant access to pre-configured accounts while you learn the platform.
Creating Your Business Manager Account (Step-by-Step)
Setting up your Business Manager takes about 10 minutes. Follow these steps exactly to avoid configuration issues later.
Step 1: Navigate to the Business Manager Portal
Open your browser and go to business.facebook.com. Click the blue “Create Account” button in the top right corner.
Step 2: Enter Your Business Information
Fill out the creation form with:
- Business name: Use your legal business name exactly as registered
- Your name: Your personal name associated with your Facebook account
- Work email: Your business email address (you’ll verify this shortly)
Click “Submit” when complete.
Step 3: Verify Your Email Address
Check your work email inbox for a verification message from Facebook. Click the confirmation link inside. This typically arrives within 2 minutes.
If you don’t see it, check your spam folders and ensure you entered the email correctly.
Step 4: Add Business Details
After email verification, you’ll add:
- Business address (physical location or registered address)
- Phone number
- Website URL
- Business category
These details help Facebook verify your business’s legitimacy and unlock certain features.
Step 5: Configure Security Settings
Immediately enable two-factor authentication for your Business Manager:
- Click the gear icon (Settings) in the top right
- Select “Security Center” from the left menu
- Click “Two-Factor Authentication”
- Choose your preferred method (authentication app recommended)
- Follow the setup instructions
Two-factor authentication is non-negotiable. It prevents unauthorized access even if someone gets your password.
For agencies managing complex multi-client setups or businesses needing immediate access to verified accounts, Uproas.io’s Facebook Business Manager solutions offer professionally configured accounts with security measures pre-installed.
Adding & Managing Business Assets
Business Manager becomes valuable when you add assets the Pages, ad accounts, Instagram profiles, and other tools powering your advertising.
Each asset type has ownership and access permission levels. Understanding the difference prevents headaches later.
Adding Facebook Pages
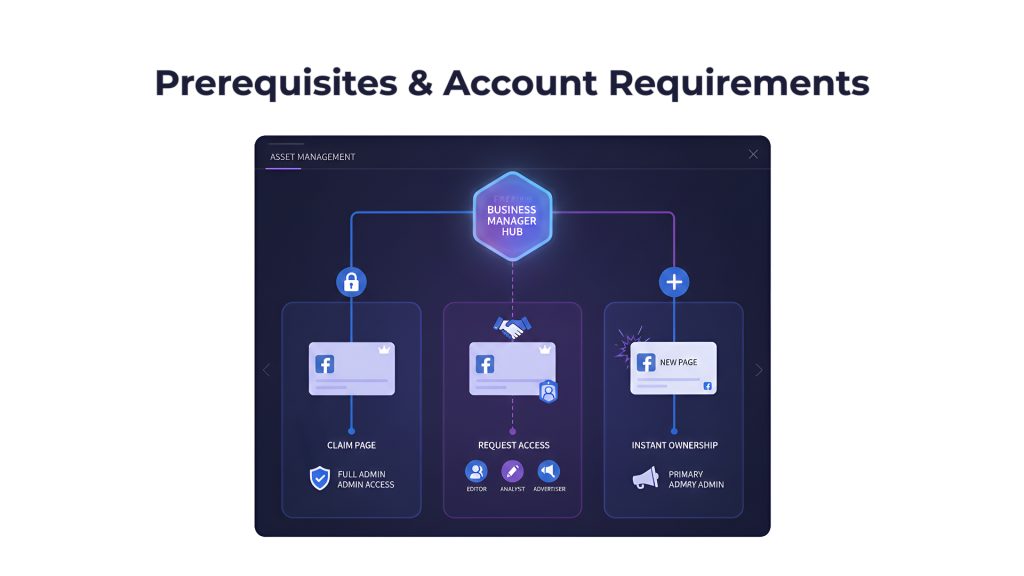
Facebook Pages are the foundation of your advertising. You have three options for adding Pages to Business Manager.
Option 1: Claim a Page You Own
If you created a Page from your personal profile:
- Go to Business Settings > Accounts > Pages
- Click “Add” then “Claim a Page.”
- Enter the Page name or URL
- Click “Claim Page”
This transfers full ownership to your Business Manager. The Page disappears from your personal profile.
Option 2: Request Access to a Client’s Page
For client work without full ownership:
- Go to Business Settings > Accounts > Pages
- Click “Add” then “Request Access to a Page.”
- Enter the Page name or URL
- Select the access level you need (Admin, Editor, Moderator, Advertiser, or Analyst)
- Click “Request Access”
The Page owner receives a notification and must approve your request.
Option 3: Create a New Page
To build a Page directly in Business Manager:
- Go to Business Settings > Accounts > Pages
- Click “Add” then “Create a New Page.”
- Follow the Page creation wizard
This Page immediately belongs to your Business Manager with full ownership rights.
Understanding Ownership vs. Access
This distinction is critical:
- Ownership: The asset belongs to your Business Manager. You have full control, including deletion and admin assignment
- Access: You can use the asset, but don’t own it. The owner can revoke your permissions anytime
Never claim a client’s Page unless they explicitly transfer ownership. Request access instead.
Setting Up Ad Accounts
Ad accounts hold your advertising campaigns, payment methods, and spending data. Each Business Manager can own up to five ad accounts.
Adding an Existing Ad Account
If you already created ad accounts from your personal profile:
- Go to Business Settings > Accounts > Ad Accounts
- Click “Add” then “Add an Ad Account.t”
- Enter the ad account ID (find this in Ads Manager settings)
- Click “Add Ad Account”
Creating a New Ad Account
To create a fresh ad account:
- Go to Business Settings > Accounts > Ad Accounts
- Click “Add” then “Create a New Ad Account.”
- Enter an ad account name (use descriptive naming like “Company Name – Region”)
- Select your time zone and currency (cannot be changed later)
- Assign an initial payment method
- Click “Create Ad Account”
Important Ad Account Warnings
When you add an ad account to Business Manager, ownership transfers permanently. The account cannot return to a personal profile. Only add accounts you fully control.
If you’re dealing with ad account limits or need additional verified accounts for scaling campaigns, Uproas.io’s Facebook ad account services offer agency-grade accounts with higher spending limits and established track records.
Connecting Instagram Accounts
Instagram Business or Creator accounts can connect to Business Manager for advertising and cross-posting.
Connection Steps
- Go to Business Settings > Accounts > Instagram Accounts
- Click “Add” then “Connect Your Instagram Account.”
- Click “Login with Instagram”
- Enter your Instagram username and password
- Authorize the connection
Your Instagram account now appears in Business Manager. You can assign team members specific permissions without sharing your Instagram login.
Additional Assets You Can Add
Business Manager supports several other asset types:
- Facebook apps: If you develop apps using Facebook’s platform
- Product catalogs: For e-commerce businesses running dynamic product ads
- Pixels: Tracking codes for your website (covered in detail later)
- Offline event sets: For tracking in-store conversions
- Custom conversions: Specific conversion events you define
Add these assets as your advertising sophistication grows.
Managing Users, Roles & Permissions
Proper permission management prevents disasters. The wrong person with admin access can delete Pages, waste ad budgets, or compromise security.
Business Manager offers three user types: People, Partners, and System Users. Most businesses only need People and Partners.
Understanding Access Levels
Business Manager has two permission layers: Business-level roles and asset-level roles.
Business-Level Roles
- Admin: Full control over the entire Business Manager, including adding/removing people, assets, and payment methods
- Employee: Can see Business Manager assets but needs specific asset permissions to work with them
Asset-Level Roles (for Pages)
- Admin: Can manage all Page aspects, including roles, settings, and deletion
- Editor: Can create/edit posts, respond to messages, and view insights
- Moderator: Can respond to and delete comments/messages, view insights
- Advertiser: Can create ads, view insights
- Analyst: Can only view insights
Asset-Level Roles (for Ad Accounts)
- Admin: Full control, including managing users and payment methods
- Advertiser: Can create and edit campaigns, view billing
- Analyst: Can view campaigns and reporting only
Adding Team Members
To add someone to your Business Manager:
- Go to Business Settings > Users > People
- Click “Add”
- Enter their email address
- Select their business role (Admin or Employee)
- Click “Next”
- Assign asset access by selecting Pages, ad accounts, or other assets
- Choose the appropriate role for each asset
- Click “Invite”
The person receives an email invitation. They must accept before gaining access.
Permission Best Practices
Follow these rules to maintain security:
- Give minimum necessary permissions (don’t make everyone Admin)
- Use the Analyst role for reporting-only team members
- Assign Advertiser (not Admin) to campaign managers
- Reserve Admin for yourself and one backup person
- Review permissions quarterly and remove unnecessary access
Adding Partners and Agencies
Partners are external businesses (agencies, vendors, consultants) who need access to your assets.
How to Add a Partner
- Go to Business Settings > Users > Partners
- Click “Add”
- Enter the partner’s Business Manager ID (they provide this)
- Click “Next”
- Assign asset access and permissions
- Click “Add Partner”
Partners can never gain full Business Manager control. They only access assets you explicitly share.
This system lets you work with agencies without giving them ownership. When the partnership ends, you remove access instantly.
Removing Access
When employees leave, or partnerships end:
- Go to Business Settings > Users > People (or Partners)
- Find the person or partner
- Click the three dots next to their name
- Select “Remove”
- Confirm removal
All their access disappears immediately. They cannot access assets, campaigns, or data.
Setting Up Facebook Pixel for Tracking
The Meta Pixel (formerly Facebook Pixel) is a tracking code you install on your website. It monitors visitor actions, builds custom audiences, and measures ad campaign effectiveness.
Every business running Facebook ads needs a pixel.
What the Pixel Does
The pixel tracks:
- Page views and specific page visits
- Product views and add-to-cart events
- Purchases and transaction values
- Form submissions and lead captures
- Custom events you define
This data powers:
- Retargeting campaigns: Show ads to people who visited specific pages
- Conversion optimization: Facebook optimizes campaigns for people likely to convert
- Accurate ROI measurement: Track which ads generate sales
- Lookalike audiences: Find new customers similar to existing converters
Creating Your Pixel
To create a pixel in Business Manager:
- Go to Business Settings > Data Sources > Pixels
- Click “Add”
- Enter a pixel name (use your business name)
- Optionally enter your website URL
- Click “Create Pixel”
Your pixel now exists but isn’t tracking anything yet. You need to install it.
Installing Pixel Code on Your Website
Facebook provides several installation methods:
Method 1: Manual Installation
- In the pixel dashboard, click “Set Up Pixel.”
- Choose “Manually Install the Code Yourself”
- Copy the pixel base code
- Paste it in your website’s header section (between <head> and </head> tags)
- Add event codes on specific pages (checkout, registration, etc.)
Method 2: Platform Integration
Most website platforms offer pixel integration:
- Shopify: Install the Facebook channel app and enter the pixel ID
- WordPress: Use the Official Facebook for WordPress plugin
- Wix: Add pixel ID in Wix settings > Tracking & Analytics
- Squarespace: Add pixel ID in Settings > Advanced > External API Keys
Method 3: Tag Manager
If you use Google Tag Manager:
- Create a new tag in GTM
- Choose “Custom HTML” tag type
- Paste your pixel code
- Set trigger to “All Pages.”
- Publish the container
Verifying Pixel Installation
After installation, verify the pixel works:
- Install the Meta Pixel Helper browser extension (available for Chrome)
- Visit your website
- Click the Pixel Helper icon
- Confirm it shows your pixel firing
You can also check in Business Manager under Data Sources > Pixels. Active pixels show green status and recent activity.
Building Custom Audiences
Custom audiences let you target specific groups based on their interactions with your business. Instead of demographic guessing, you advertise to people who already know you.
Types of Custom Audiences
Facebook offers several custom audience sources:
Website Visitors
Target people who visited your site (requires pixel):
- All website visitors in the last 30/60/90/180 days
- Visitors to specific pages
- Visitors who spent a specific time on the site
- Visitors who triggered specific events
Customer Lists
Upload email addresses, phone numbers, or user IDs:
- Email subscribers
- Past customers
- CRM contacts
- Mobile app users
Engagement Audiences
Target people who interacted with your content:
- Video viewers (various time thresholds)
- Instagram profile visitors
- Form openers or submitters
- Event responders
App Activity
For mobile apps, target users based on in-app actions.
Creating Your First Custom Audience
To create a website visitor audience:
- Go to Business Settings > Audiences
- Click “Create Audience” > “Custom Audience.”
- Select “Website” as the source
- Choose your pixel
- Define the audience rule (e.g., “All website visitors in the last 30 days”)
- Name your audience descriptively
- Click “Create Audience”
Facebook needs 100+ people in an audience before you can use it for campaigns. Smaller audiences won’t deliver.
Audience Best Practices
Follow these guidelines for effective audiences:
- Use appropriate time windows: 30 days for purchase-intent products, 180 days for long sales cycles
- Create specific audiences: “Product page visitors” works better than “all website visitors.”
- Build exclusion audiences: Create audiences of recent purchasers to exclude from acquisition campaigns
- Layer audiences: Combine website visitors who also match demographic criteria
- Refresh regularly: Audiences update continuously as people qualify or age out
Compelling content drives the engagement that feeds your custom audiences. Use Socialmelo social media content guides to optimize your Instagram and Facebook profiles for maximum engagement and conversions.
Creating Your First Ad Campaign
With your Business Manager configured and pixel tracking, you’re ready to launch advertising campaigns.
Facebook’s campaign structure has three levels: Campaign, Ad Set, and Ad. Each level controls specific elements.
Understanding Campaign Structure
- Campaign Level: Where you choose your objective (what you want to achieve)
- Ad Set Level: Where you define audience, budget, schedule, and placements
- Ad Level: Where you create the actual advertisement (images, video, text)
One campaign can contain multiple ad sets. One ad set can contain multiple ads. This structure lets you test variations systematically.
Accessing Ads Manager from Business Manager
To open Ads Manager:
- Click the menu icon (nine dots) in the top left of Business Manager
- Select “Ads Manager”
- Choose the ad account you want to use
You’re now in the campaign creation interface.
Choosing Campaign Objectives
Click the green “Create” button to start a campaign. Facebook asks you to select an objective aligned with your business goal:
Awareness Objectives
- Brand Awareness: Reach people likely to remember your ads
- Reach: Show ads to the maximum number of people
Consideration Objectives
- Traffic: Send people to your website or app
- Engagement: Get post reactions, comments, shares, and event responses
- App Installs: Drive mobile app downloads
- Video Views: Get people to watch your videos
- Lead Generation: Collect contact information via Facebook forms
- Messages: Start conversations in Messenger or WhatsApp
Conversion Objectives
- Conversions: Drive specific actions on your website (purchases, registrations)
- Catalog Sales: Show dynamic product ads from your catalog
- Store Traffic: Bring people to physical locations
Choose the objective matching your immediate goal. The objective affects how Facebook optimizes your campaigns.
Setting Up Your Ad Set
After selecting an objective, you configure the ad set:
Audience Definition
Specify who sees your ads:
- Location: Countries, states, cities, or a radius around an address
- Age: Minimum and maximum age range
- Gender: All, men, or women
- Detailed targeting: Interests, behaviors, demographics
- Custom audiences: Your uploaded or pixel-based audiences
- Connections: People who like your Page or their friends
Facebook shows an audience size meter. Aim for a “specific” range (green zone). Too broad wastes money, too narrow limits delivery.
Placements
Choose where ads appear:
- Automatic placements: Facebook decides (recommended for beginners)
- Manual placements: You select specific locations (Facebook Feed, Instagram Stories, Messenger, etc.)
Start with automatic. Facebook allocates budget to best-performing placements.
Budget and Schedule
Set your spending parameters:
- Daily budget: Amount spent per day (campaigns run continuously)
- Lifetime budget: Total amount for the entire campaign duration
Minimum budgets vary by objective, typically $1-5 per day. Start small while testing.
Choose start and end dates, or run continuously until you pause manually.
Optimization and Delivery
Tell Facebook how to optimize:
- Conversions: Optimize for people likely to convert
- Link clicks: Optimize for clicks to your website
- Impressions: Maximize ad views
- Daily unique reach: Show ads to different people daily
Match optimization to your objective.
Creating Your Ad Creative
The final step is designing the actual advertisement:
Select Format
- Single image: One photo with text
- Single video: One video with text
- Carousel: Multiple scrollable images or videos
- Collection: Featured image/video with product grid below
Upload Media
Add your images or videos. Follow Facebook’s specifications:
- Images: 1080 x 1080 pixels (square) or 1200 x 628 pixels (landscape)
- Videos: At least 1080 pixels wide, H.264 compression, under 4GB
- Text on images: Keep minimal (avoid covering more than 20% of the image)
Write Copy
Craft your ad text:
- Primary text: Main description (appears in feed)
- Headline: Bold text below image
- Description: Additional text under headline (doesn’t always show)
- Call-to-action button: “Shop Now,” “Learn More,” “Sign Up,” etc.
Keep primary text under 125 characters for best mobile display.
Add Website URL
Enter the landing page URL where people arrive after clicking. Use specific products or landing pages, not just your homepage.
Preview and Publish
Review your ad across placements using the preview panel. Check mobile and desktop versions.
When satisfied, click “Publish” to submit for review. Facebook typically reviews ads within 24 hours.
While Facebook ads deliver quick results, integrating organic search strategies creates sustainable growth. SEOSkit.com’s comprehensive SEO services can build the organic foundation that complements your paid advertising efforts.
Advanced Features & Optimization
Once you master basic campaign creation, Business Manager offers advanced features for scaling and efficiency.
Business Asset Groups
Asset Groups bundle Pages, ad accounts, pixels, and catalogs for partners or employees to access simultaneously.
Instead of assigning assets individually, you add someone to an Asset Group,p and they inherit all permissions at once.
Creating an Asset Group
- Go to Business Settings > Accounts > Asset Groups
- Click “Create Asset Group”
- Name the group (e.g., “Client A – All Assets”)
- Add the relevant Pages, ad accounts, pixels, and catalogs
- Click “Create”
Now assign the Asset Group to partners or employees. They get access to everything in one action.
This feature is essential for agencies juggling numerous client accounts.
Managing Multiple Business Locations
Businesses with physical stores can add locations to reach nearby customers:
- Go to Business Settings > Accounts > Locations
- Click “Add Locations”
- Enter individual addresses or upload a CSV file for bulk import
- Verify locations
Use locations for store traffic campaigns and local awareness ads.
Payment Method Management
Centralize billing for all ad accounts:
- Go to Business Settings > Payments
- Click “Add Payment Method”
- Enter credit card or PayPal information
- Assign the payment method to specific ad accounts
You can set different payment methods for different ad accounts or use one for everything.
Automated Rules
Create rules that automatically manage campaigns:
- In Ads Manager, select campaigns
- Click “Create Rule”
- Set conditions (e.g., “If cost per result is above $10”)
- Choose action (e.g., “Pause ad set”)
- Set check frequency
Automated rules prevent runaway spending and maintain performance thresholds.
Off-platform SEO strengthens your overall marketing performance. Building high-quality backlinks through Linkscope.io’s vetted link-building marketplace improves domain authority, which can lower your cost-per-click on Facebook ads by improving landing page quality scores.
Security & Best Practices
Business Manager security protects your advertising investment, business assets, and customer data. One security breach can cost thousands in unauthorized ad spend or lost assets.
Enable Two-Factor Authentication (Mandatory)
Two-factor authentication (2FA) adds a second verification step beyond your password. Even if someone steals your password, they cannot access your account without the second factor.
Setting Up 2FA
- Go to Business Settings > Security Center
- Click “Two-Factor Authentication”
- Choose your method:
- Authentication app (recommended): Use Google Authenticator, Authy, or similar
- Text message: Receive codes via SMS
- Security key: Use a physical hardware key
- Follow the setup instructions
- Save backup codes in a secure location
Enable 2FA on your personal Facebook account and Business Manager. Require all admins to use 2FA.
Security Center Overview
The Security Center monitors potential threats:
- Recent login activity and locations
- Unrecognized devices accessing your account
- Security recommendations
- Connected apps and services
Check the Security Center monthly for suspicious activity.
Best Practices for Permission Management
Follow these permission guidelines:
Principle of Least Privilege
Give users the minimum permissions needed for their role. A copywriter doesn’t need ad account admin access.
Regular Permission Audits
Review user lists quarterly:
- Remove former employees immediately
- Downgrade permissions for role changes
- Verify partner access is still needed
Separate Personal and Business
Never run personal ads from business ad accounts. Keep activities completely separate to prevent cross-contamination if one gets restricted.
Document Who Has Access
Maintain a spreadsheet listing:
- User names
- Email addresses
- Assets they can access
- Permission levels
- Date added
This documentation becomes critical during security incidents.
Protecting Against Unauthorized Access
Additional security measures:
- Use unique, complex passwords (20+ characters, password manager)
- Never share login credentials via email or messaging
- Use business email addresses, not personal emails
- Enable login alerts for new devices
- Review active sessions and log out unused devices
- Avoid public WiFi when accessing Business Manager
Backup Admin Assignment
Assign at least two people as Business Manager admins. If one loses access, the other can maintain operations and restore permissions.
Choose your backup admin carefully. They have full control over assets and financial information.
Troubleshooting Common Issues
Even with careful setup, you’ll encounter problems. These solutions address the most frequent issues.
“Can’t Claim This Page” Error
This error means the Page already belongs to another Business Manager.
Solution
The current owner must remove the Page from their Business Manager first:
- They go to Business Settings > Accounts > Pages
- Find the Page
- Click “Remove”
- Confirm removal
After removal, you can claim the Page. The Page must not belong to any Business Manager before claiming.
Alternatively, request access instead of claiming ownership.
Ad Account Access vs. Ownership Confusion
People often confuse accessing an ad account with owning it.
- Access: You can use the ad account, run campaigns, and view data (but don’t own it)
- Ownership: The ad account belongs to your Business Manager (you control it completely)
When someone shares an ad account with you, you get access only. They retain ownership and can revoke your access anytime.
To transfer ownership, the current owner must add the ad account to your Business Manager and remove it from theirs.
Instagram Connection Failures
Instagram accounts sometimes fail to connect.
Common Causes and Fixes
- Account type is personal, not business: Convert to Business or Creator account in Instagram settings.
- Account already connected elsewhere: Instagram accounts can only connect to one Business Manager.r
- Login credentials incorrect: Verify username and password
- Instagram account restricted: Check for restriction notices in the Instagram app
Try disconnecting and reconnecting. If that fails, remove the account from other Business Managers first.
Permission Request Limitations
Facebook limits how many times you can request access to assets.
If you request access and the owner doesn’t respond, you cannot request again for 7 days. Request carefully and follow up with owners directly.
Business Verification Issues
Some features require a verified Business Manager status. Verification failures typically result from:
- Business name doesn’t match legal registration
- Website domain doesn’t match business name
- Phone number is personal, not a business line
- Documents don’t clearly show the business name and address
Provide official documents (business license, articles of incorporation, utility bill with business name).
Ad Account Bans and Restrictions
Facebook sometimes disables ad accounts for policy violations, real or perceived.
If Your Ad Account Gets Disabled
- Review the notification to understand the violation
- Click “Request Review” if you believe it’s a mistake
- Provide a clear explanation and evidence
- Wait for Facebook’s decision (typically 1-3 business days)
Prevention Strategies
- Never violate advertising policies (read them fully)
- Avoid sudden spending increases (scale gradually)
- Use clear landing pages matching ad content
- Don’t advertise prohibited products
- Maintain good payment history
For serious ad account issues like bans or restrictions, Uproas.io’s Facebook unban services can help restore access and resolve account issues professionally.
Conclusion
Facebook Business Manager transforms chaotic advertising operations into organized, scalable systems. You now have the knowledge to set up your account properly, add assets with correct permissions, manage team access securely, and launch effective campaigns.
Start with the basics: create your Business Manager, add your most important Page and ad account, enable two-factor authentication, and run your first campaign. As you gain confidence, add pixels, build custom audiences, and explore advanced features.
Proper setup prevents the costly mistakes that lead to ad account restrictions and lost business assets. Take your time with permissions, prioritize security, and document your structure. For creating memorable usernames across platforms, the UniqueNicknames Generator helps develop distinctive brand identities.
Success with Business Manager comes from understanding both the technical setup and the strategic thinking behind permission structures, audience building, and campaign optimization. Lifestyle brands like EBGrooming demonstrate how maintaining consistent quality across touchpoints ensures every interaction reinforces brand trust. Content creators can study platforms like Erome to understand specialized community engagement techniques applicable across diverse industries